
Installing doors over cavity walls requires careful planning and a precise understanding of how cavity walls are built. These walls are designed to improve insulation and reduce moisture transfer, which means any modification must preserve their structural and thermal integrity. Whether you are remodeling your home or replacing an old door, proper installation ensures long-lasting performance, better energy efficiency, and improved moisture control.
This guide from Mr. Fixer, your trusted door and window repair expert in San Antonio, will walk you through everything you need to know about installing a door over a cavity wall. You will learn how cavity walls work, the steps involved in creating a door opening, how to maintain thermal efficiency, and which common mistakes to avoid.
What Is a Cavity Wall
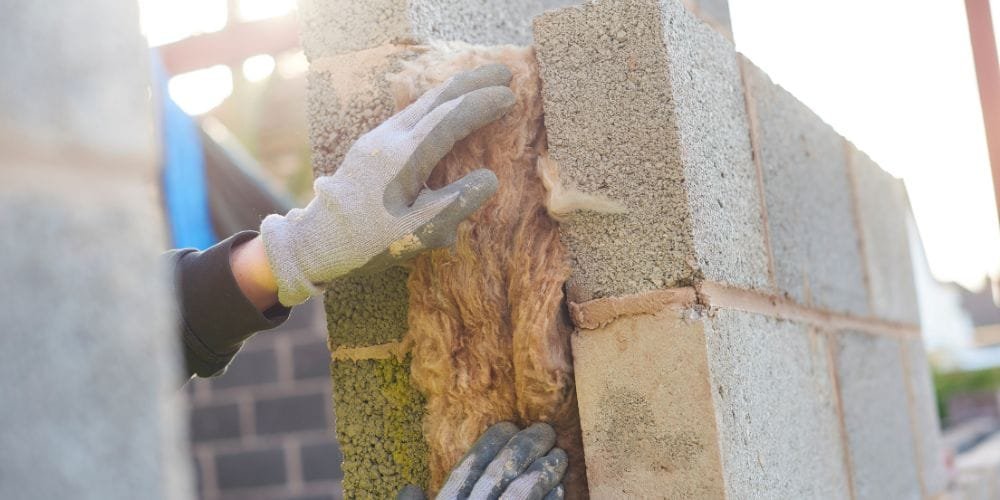
A cavity wall is made of two parallel masonry walls known as leaves. The inner leaf faces the interior of the home while the outer leaf shields the structure from weather conditions. Between these leaves is a gap known as the cavity, which improves insulation, minimizes heat transfer, and helps control moisture.
The cavity prevents rainwater from penetrating the structure since any moisture that enters the outer leaf drains safely through the cavity. This design makes cavity walls popular in modern construction due to their strength, energy efficiency, and weather resistance.
When installing a door in a cavity wall, both leaves and the cavity must be handled carefully. Poor treatment of the cavity can lead to insulation loss, moisture issues, or structural weakness.
How to Install a Door Over a Cavity Wall
Door installation over cavity walls is not the same as installing a door in a standard solid wall. It requires careful measurements, proper support, and precise handling of both the outer and inner walls. Below is a detailed step-by-step guide to help you understand the process.
Step 1: Planning and Preparation
Before any cutting or structural work begins, planning is essential. This step determines whether the wall can support a new opening and whether additional reinforcements are necessary.
Consult a Structural Engineer
If the cavity wall is load-bearing, a structural engineer must be involved. They will identify load distribution points and recommend reinforcement to maintain the integrity of the building.
Choose the Right Door
Select the size and type of door based on the architectural design of your home. Ensure the style matches your interior and exterior aesthetic. Sliding doors, pocket doors, or hinged doors all have specific installation requirements.
Take Accurate Measurements
Measure the height, width, and depth of the cavity wall. Outline the door frame on the wall surface using chalk or tape. Accurate measurements make the cutting and installation process much smoother.
For additional help with door hardware, you can check out our guide on How to Install a Door Knob.
Step 2: Preparing the Opening
Once the planning is complete, the next stage involves creating the door opening in the cavity wall.
Install a Lintel First
A lintel is a structural support beam installed above the door opening. Before cutting the wall, the lintel must be positioned across the entire width of the cavity wall covering both leaves.
A properly installed lintel ensures the wall remains stable during and after the opening process. Without this support, the masonry structure could weaken or collapse.
Cutting the Wall
After the lintel is secure:
- Use masonry tools to cut through the outer leaf
- Cut through the inner leaf while maintaining the integrity of the cavity
- Ensure all cuts are straight and clean
- Remove debris carefully without disturbing insulation
- Maintain moisture barriers as much as possible
Precise cutting ensures the door frame will fit tightly and securely.
Step 3: Installing the Door Frame
The door frame is the foundation of the entire installation. A poor frame installation leads to alignment issues, air leakage, and structural weakness.
Position the Frame Correctly
Place the frame inside the opening and check for:
- Level alignment
- Plumb vertical lines
- Correct depth relative to wall thickness
Securing the Frame
Use metal brackets or anchor bolts to secure the frame to the masonry. Attach it firmly to both the inner and outer leaf sides to maintain stability.
If the cavity contains insulation material, ensure it stays intact and does not get compressed too tightly around the frame.
Step 4: Ensuring Thermal and Moisture Efficiency
Cavity walls are designed to block moisture and reduce heat transfer, so you must protect these features during installation.
Apply Expanding Foam Insulation
Fill gaps around the door frame using expanding foam. This improves insulation and blocks drafts from entering your home.
Install a Damp Proof Course (DPC)
A DPC is necessary at the base and sides of the door frame. It prevents moisture from traveling into the interior space. The DPC should seamlessly connect with the existing cavity wall DPC to create a continuous moisture barrier.
Add Flashing Above the Door
Flashing helps divert rainwater and protects the frame and cavity. Proper flashing prevents water penetration, which is especially important in areas with heavy rainfall.
Moisture control is essential to protect your home from mold, dampness, and structural damage.
Step 5: Final Finishing and Adjustments
This final stage ensures the door functions smoothly and the installation is weatherproof.
Hang the Door
Attach the hinges to the frame and mount the door. Check for:
- Smooth opening and closing
- No rubbing against the frame
- Proper alignment with the threshold
- Secure locks and latches
Adjust hinge screws or hardware if needed.
Seal the Exterior Edges
Caulk or apply weatherproof sealant around the outside edges of the door frame. This prevents air infiltration and increases energy efficiency.
Add Internal Trim or Architraves
Install interior trim to complete the look and cover gaps between the wall and frame.
Improper installation or sealing around cavity walls can allow moisture to enter, which may lead to hidden structural issues and increase the cost to repair water damage in Texas over time.
Advantages of Cavity Walls
Cavity walls offer many benefits that make them ideal for modern construction. Below are the key advantages.
1. Excellent Thermal Insulation
The air gap between the leaves acts as a thermal buffer and reduces heat transfer. Homes stay warmer in winter and cooler in summer, which improves energy efficiency.
2. Superior Moisture Resistance
The outer leaf prevents rainwater penetration, and the cavity allows moisture to drain away. This reduces the risk of dampness and mold growth.
3. Better Sound Insulation
The dual wall structure minimizes noise transmission. This makes cavity walls ideal for properties near roads, airports, and busy commercial areas.
4. Energy Efficient Construction
Cavity walls help reduce heating and cooling costs. Lower energy usage also reduces your carbon footprint, which supports sustainable living.
5. Fire Resistance
The air gap acts as a barrier that slows the spread of fire. Most cavity wall systems meet modern fire safety standards.
6. Flexible Design Options
Cavity walls support different finishes such as brick, stone, or concrete, which makes them versatile for architectural designs.
For more maintenance tips, visit our blog on Common Door Issues.
Common Mistakes to Avoid When Installing Doors in Cavity Walls
Adding this section helps improve ranking and improves user experience.
- Cutting the cavity wall without installing a lintel
- Ignoring insulation and moisture barriers
- Using incorrect frame depth for cavity walls
- Not sealing the edges properly
- Compressing cavity insulation materials
- Using weak hinges for heavy doors
- Skipping structural engineering consultation
Avoiding these mistakes ensures a long-lasting and reliable door installation.
When Should You Call a Professional
Installing a door over a cavity wall is not a simple DIY task. You should call a professional when:
- The wall is load-bearing
- You lack masonry or structural knowledge
- Moisture barriers are damaged
- The cavity insulation is complicated
- The door size is larger than the existing opening
Mr. Fixer provides expert door repair, door installation, and carpentry services in San Antonio with guaranteed quality.
Conclusion
Installing a door over a cavity wall requires skill, precision, and an understanding of how cavity walls function. From installing lintels to maintaining insulation and moisture barriers, every step plays an important role in ensuring safety, durability, and energy efficiency. A properly installed door provides smooth operation, long-lasting performance, and improved protection against water damage and weather conditions.
If you want a professional and reliable door installation service in San Antonio, Mr. Fixer is here to help. Contact us today for expert assistance and experience hassle-free service that enhances your home.