Home Painting

The Importance of Quality Painting in Home Décor

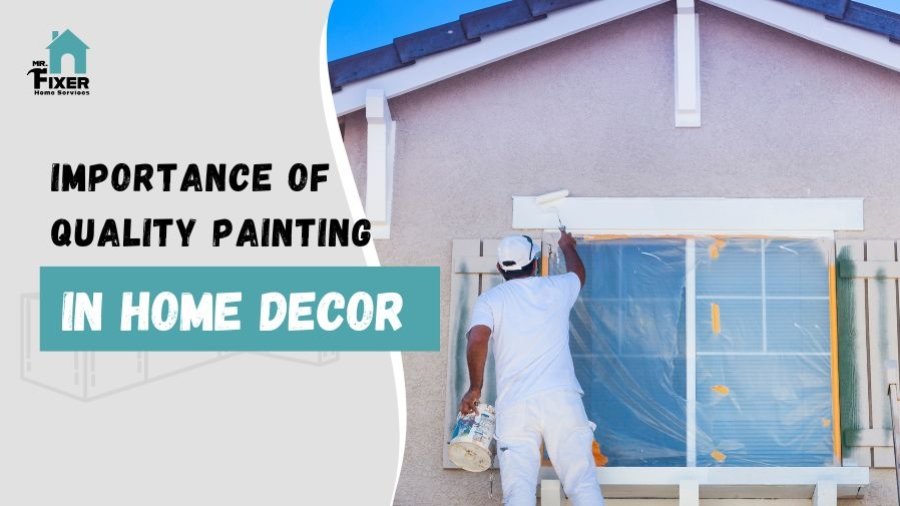
When it comes to home décor, painting is more than just a finishing touch—it’s a defining feature that sets the tone for the entire space. Quality painting not only enhances the aesthetic appeal of a home but also plays a crucial role in protecting and maintaining the integrity of the walls. Here’s why investing in quality painting is essential for home décor.

Color Selection and Mood:

Color Selection for Painting

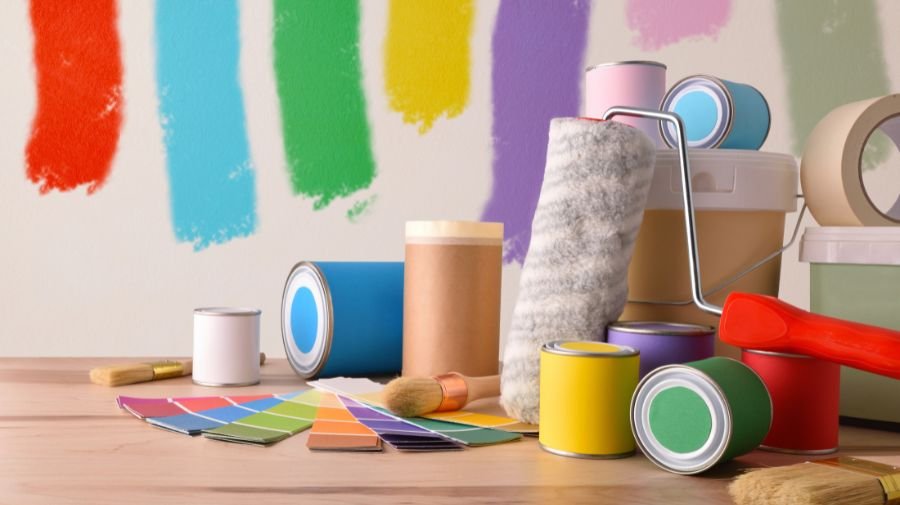
The colors you choose for your home can significantly impact the atmosphere of each room. Warm colors like reds and yellows create a cozy, inviting feel, while cool colors like blues and greens evoke a sense of calm and relaxation. Quality painting ensures that the chosen colors are applied evenly and vibrantly, bringing your vision to life.

Texture and Finish:

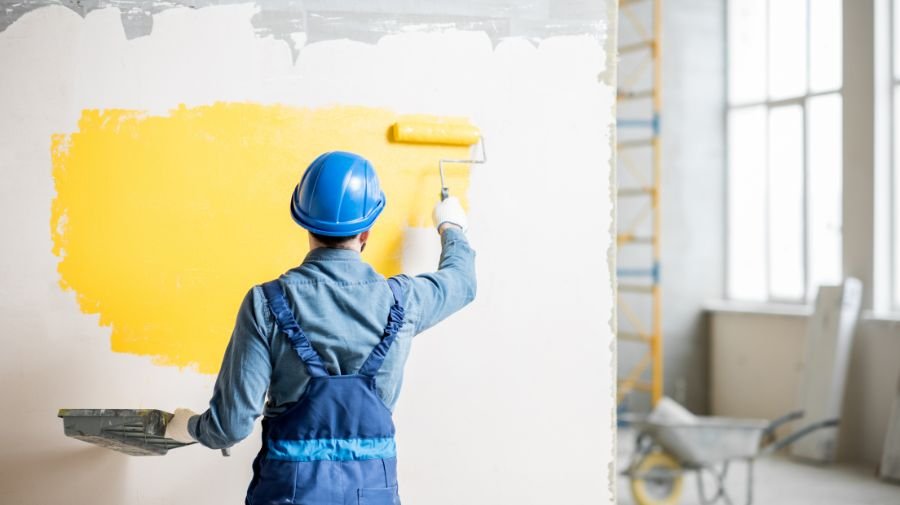
Quality painting provides a smooth, professional finish that can be customized to suit your style. Whether you prefer a matte, satin, or glossy finish, a professional painter can achieve the desired effect without streaks or uneven patches, enhancing the overall look of your décor.

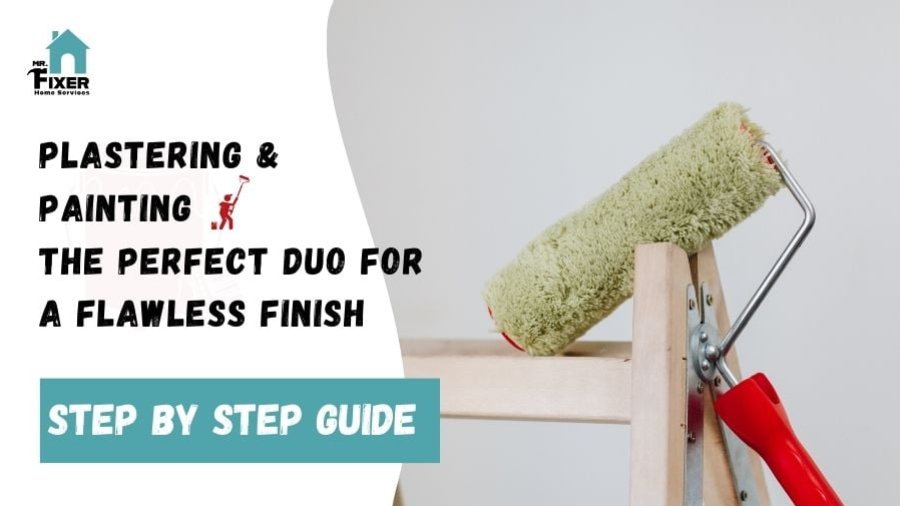
Plastering & Painting – The Perfect Duo for a Flawless Finish:

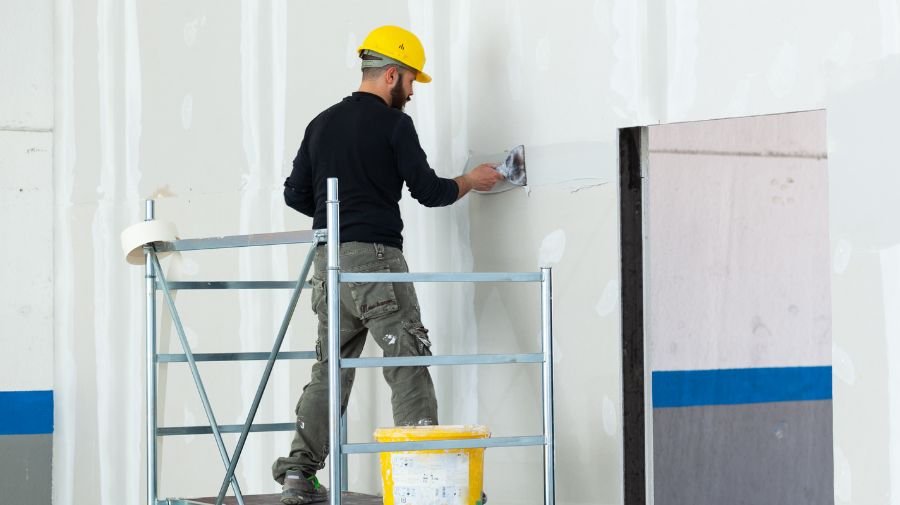
To achieve a truly flawless finish, consider the perfect duo of plastering and painting. Plastering provides a smooth and even surface, essential for ensuring that paint adheres properly and looks its best. A well-plastered wall enhances the paint’s durability and appearance, resulting in a more polished and professional look.

Protection of Surfaces:

Protection of surface by quality painting

Paint acts as a protective layer for your walls, shielding them from moisture, dust, and other environmental factors. Quality paint and proper application techniques ensure that this protective layer is effective and long-lasting, preventing issues like mold, mildew, and peeling.

Increased Property Value:

A well-painted home can significantly boost its market value. Prospective buyers are more likely to be attracted to a property that looks well-maintained and stylish. Quality painting is an investment that pays off by enhancing the curb appeal and overall desirability of your home.

Cost-Effectiveness:

While high-quality paint and professional services might cost more upfront, they are more cost-effective in the long run. The durability and reduced need for frequent repaints mean that you save money over time, making it a wise investment for any homeowner.

Customization and Personal Touch:

Your home is a reflection of your personality and style. Quality painting allows you to express yourself through color, texture, and design. Whether you prefer bold, dramatic colors or soft, neutral tones, a quality paint job can help you achieve the exact look you want.

Enhancing Architectural Features:

Quality painting can highlight and enhance the architectural features of your home. From accent walls to intricate moldings, a skilled painter can draw attention to these elements, adding depth and character to your space.

Conclusion

Quality painting is an essential aspect of home décor. It enhances the aesthetic appeal, increases property value, and improves mood and well-being. By choosing the right paint and hiring professional painters, you can transform your home into a beautiful and inviting space. Invest in quality painting to enjoy the long-term benefits and create a home you love. For professional painting services that guarantee top-notch quality and a flawless finish, consider hiring Mr. Fixer. With years of experience and a team of skilled painters, Mr. Fixer provides exceptional painting services that meet your specific needs and preferences.

Plastering and painting service

Plastering & Painting- The Perfect Duo for a Flawless Finish

Home improvement epitomizes the art of functionality and aesthetics when creating beautiful, long-lasting spaces. Among several techniques and materials used for home improvement, plastering and painting set a perfect dual partnership that can drive a flawless finish. Both complement each other to ensure that your walls are strong, smooth, and vibrant in appearance.

In this article, we will discuss the roles of plastering and painting and their ability to work well together.

Understanding Painting

Understanding Painting

Painting is a multi-purpose activity in house renovation: It makes walls attractive, protects the wall surfaces, and may even reflect the moods or atmospheres of people in the room.

Purpose of Painting

People usually paint to provide color and character to a space. It protects them from the wear of water, sunlight, and other natural elements on the walls. Paint can also be used to mask imperfections, thus giving walls a clean and finished appearance.

Types of Painting

  1. Interior Painting includes wall painting decor, designer wall painting, and wall art for the living room. It concentrates on beautifying the interior settings.
  2. Exterior Painting: This involves outdoor painting and protects exterior walls from weather elements.
  3. Specialty Painting includes faux finishes, textured painting, and colored plaster for interior walls.

Benefits of Painting

  • Aesthetic Appeal: Fresh paint reinvents any area by making it new and attractive.
  • Protection: Good paint protects the wall from moisture, dust, and UV, increasing its life.
  • Customization: Paint offers endless possibilities in customizing a space to personal taste and style.

Understanding Plastering

Understanding Plastering

Plastering is one of the most critical wall construction and renovation processes. It produces a smooth, hard surface ready for painting or other finishes.

Purpose of Plastering

It involves applying a smooth layer to walls and ceilings. Plastering is especially necessary for new construction and interior plaster wall repair, making the wall solid and without imperfections.

Types of Plasters

  1. Gypsum Plaster: It plasters interior walls because it has a smooth finish and a fast setting time.
  2. Cement Plaster: It is best suited for exterior walls or lining inside stucco walls due to its strength and resistance to dampness or water.
  3. Lime Plaster: Breathable and gives a natural finish, used in restoration works.

Benefits of Plastering

  • Durability: Plaster forms a hard and resilient surface that provides resistance against wear and tear.
  • Smooth Finish: This will give a level surface crucial for perfect painting.
  • Versatility: It is suitable for interior and exterior works, such as plastering outside walls and exterior wall plasters.

Why Plastering and Painting Are The Perfect Duo

Following are some factors that make plastering and painting the perfect duo:

  • Smooth Finish: The plastering provides a seamless base to the paint, which sits very well and appears uniform.
  • Improved durability: The plaster and paint enhance durability by protecting the walls.
  • Aesthetic Versatility: Plastering provides numerous textures and finishes, while paint offers excellent flexibility in color and design.

Process of Plastering and Painting

Plastering Process

  1. Mixing Plaster: Combine just the appropriate amount of plaster powder in water until you obtain a smooth, lump-free mixture.
  2. Application of First Coat (Scratch Coat): Apply one layer of plaster and ensure it is well attached to the wall surface.
  3. Application of the Second Coat (Brown Coat): The second layer builds thickness and smooths the surface.
  4. Finishing Coat (Smooth Coat): Apply the final thin coat for an ultra-smooth finish.

Painting Process

  1. Choosing the Right Paint and Tools: Choose the right type of paint. Then, collect the correct brushes, rollers, clothes for drops, and all other necessary utensils.
  2. Priming the Plastered Surface: Apply a primer over the plastered wall to ensure it properly adheres to the paint and increases its lifespan.
  3. Apply the First Coat of Paint: The first coat should be applied in even strokes, covering the entire surface.
  4. Additional Coats for Faultless Finishing: One or more additional coats should be applied to achieve a uniform, lively color.

Maintenance and Upkeep

Regular Cleaning and Inspections

Clean dust and dirt off painted surfaces frequently, and inspect all walls for damage or wear at the same frequency.

Repairing Cracks and Chips Promptly

You should attend to any cracks in the plaster or chips in the paint immediately to prevent further damage and maintain a flawless appearance.

When to Consider Replastering and Repainting

You should perform replastering and repainting on walls with considerable wear out or damage or when a new look is required. The expression of these signs comes in the form of peeling paint off the wall, severe cracks that become visible, or colors/designs that are relatively outdated.

Conclusion: Enhancing Your Space with Expert Plastering and Painting

Plastering and painting are steps to home improvement; however, they can give a place shape from the foundation upwards. If done by an expert, such processes can transform any space into a beautiful, durable, personalized environment.

Let the experts at Mr. Fixer do enamel work, be it repairing interior walls, painting plaster walls, or starting a home painting project, with impeccable results to enhance space and uplift the aesthetic appeal of your home.

Water Damage Restoration

7 Important Tips for Water Damage Restoration

Water damage is a serious issue, whether it’s caused by a burst pipe, a severe storm, or flooding. It’s important to act quickly and efficiently to prevent additional damage and health risks.

Here are seven important tips to help you effectively manage the water damage restoration process.

1. Ensure Safety First

Before beginning any restoration work, it’s important to prioritize safety for everyone involved. Turn off the electricity and gas supply to prevent electrical shocks or gas leaks. Make sure to wear protective gear, such as gloves, masks, and boots, to avoid exposure to contaminants.

2. Identify and Stop the Water Source

Finding and stopping the source of the water is crucial to prevent further damage. If it’s a burst pipe, turn off the main water valve. In the case of natural flooding, wait until the floodwaters recede before beginning restoration.

3. Assess the Damage

Conduct a thorough inspection to assess the extent of the damage. Document the damage with photos and videos for insurance purposes. This will help you file a comprehensive claim and get the necessary coverage for repairs.

4. Remove Standing Water

Be prompt in removing standing water using pumps, wet vacuums, or buckets. The longer the water remains, the greater the damage it can cause, resulting in mold growth and structural issues. Make sure to extract all water from carpets, furniture, and other affected areas.

5. Dry and Dehumidify the Area

Drying the affected areas is essential to prevent mold and mildew growth. Use fans, dehumidifiers, and open windows to increase airflow and reduce humidity. Ensure thorough attention to walls, floors, and hidden spaces where moisture can accumulate.

6. Clean and Disinfect

Thoroughly clean and disinfect all affected areas to eliminate bacteria and prevent mold growth. Use appropriate cleaning solutions and disinfectants to sanitize surfaces. Pay special attention to items that come into contact with contaminated water, such as sewage or floodwater.

7. Repair and Restore

After making sure everything is dry and sanitized, begin repairing and restoring your property. This may include replacing drywall, flooring, and insulation, as well as repairing any structural damage. It’s often best to hire professionals to ensure that the restoration is done correctly and safely.

For more detailed : The Water Damage Restoration Process: Step-by-Step Guide

Conclusion

Water damage restoration can be overwhelming, but these tips can help you manage it effectively: prioritize safety, act swiftly to stop the source of water, and assess the damage thoroughly. Remove standing water promptly, dry out the area completely, and clean and disinfect affected surfaces. For extensive damage, consider hiring professionals like Mr. Fixer to ensure your property is restored efficiently. Contact us for reliable water damage restoration services to get your home back to normal quickly.

Water Damage restoration machine

The Water Damage Restoration Process: Step-by-Step Guide

Any business owner, property manager, or facility team member’s biggest concern is always water damage caused by a natural flood, burst pipe, overflowed appliance, or any other situation.

Water mitigation requires exact science to guarantee everything is restored and safe. If your building has water damage, see what your options are. Continue reading this step-by-step guide to get your water damage cleanup done quickly.

What is Water Damage Restoration?

The water damage restoration process is a complete practice to conclude, prevent, and correct the destruction and breakage due to water invasion. Whether from a natural disaster, plumbing failure, or anything else, you can imagine how water enters your home when you do not want it to. The objective is to return the damaged areas to their pre-damage state and guarantee that you live in secure and healthy surroundings.

Why is Water Damage Restoration Important?

Water damage restoration is necessary for your walls, floors, and ceilings because you will experience it not only as a cause but also as an effect. Water damage and structural defects are often related; therefore, discovering one typically warrants checking for the other. Damage from water can cause walls, ceilings, and even floors to collapse.

Additionally, by not paying attention to water damage or immediately taking care of it, there are other long-term health hazards powered by this love, such as mold appearance and the cultivation of bacteria and pests.

Downplaying the necessity of water damage restoration undermines the skill, knowledge, and expertise needed to carry out such work and places building inhabitants’ lives at considerable risk.

What are the Signs of Water Damage?

Early water damage detection can help avert further damage. The common symptoms can be:

  • Water Stains: Discoloration on walls, ceilings, or floors is usually the first thing people notice concerning water damage. These stains can be yellow and brown and could mean a leak exists behind the surface.
  • Warped Floors: Flooding can cause your floorboards to buckle, cup, or sag. Water that seeps into the flooring’s material will swell and become warped.
  • Musty Odor: A consistent damp smell is a clear sign of mold or mildew buildup, which can occur due to prolonged moisture exposure.
  • Peeling Paint: Besides bubbling paint, removing the adhesion between your walls’ top layer of paint can show rot infiltrating the back layers. Promptly remove and replace any areas affected by moisture to prevent further damage.
  • Mold: Any black, green, or white mold growing on surfaces caused by water backup. Water and mold restoration is necessary as it can cause serious health problems that will be expensive to treat.

What are the Major Causes of Water Damage?

Understanding the causes of water damage helps you prevent it efficiently. Water damage can result from plumbing failures such as burst pipes, leaks, faulty systems, and natural disasters like flooding and severe storms. Broken appliances—dishwashers, water heaters—and roof leaks from damaged shingles or gutters contribute to water damage.

Poorly maintained HVAC systems, clogged condensation lines, and other malfunctions can cause water damage. Regular maintenance and timely repairs prevent these malfunctions.

Water Damage Restoration Process

Effective restoration of water damage involves several critical steps:

1. Conduct a Water Damage Inspection

The most critical part is to inspect and determine the amount of damage you have. Find the source where water flows and leaks, and check the contamination level and affected areas. A professional water damage contractor uses moisture meters and infrared cameras to locate hidden areas of water damage.

2. Remove Standing Water via Extraction

After finishing the inspection, remove any standing water as well. High-powered pumps and vacuum units quickly extract water to prevent further damage and mold growth. Speed and efficiency are directly related to minimizing damages for water damage services.

3. Dry and Dehumidify Affected Areas

After removing most of the water, start drying and dehumidifying your property. Dehumidifiers, which are also industrial-grade in some cases, and air movements are employed to dry away walls, floors, and other impacted areas. Preventing mold and mildew is crucial at this step.

4. Clean and Sanitize All Surfaces

After drying all the affected surfaces, clean and disinfect them. Debris removal, surface disinfection, and mold treatment disinfect surfaces. Unique cleaning products and techniques can ensure a clean environment.

5. Repair and Reconstruct if Necessary

Finally, any damage must be repaired and replaced. It could involve replacing the drywall, flooring, and insulation or something more straightforward, such as painting and restoring your home to normal. A complete water restoration guarantees the house is secure, functional, and looks great!

Efficient Water Damage Restoration Process with Mr. Fixer Home Services

When disaster strikes, trust Mr. Fixer Home Services with all your water mitigation and water damage restoration needs!

We organize our swift water removal services. By quickly removing the water, drying, and dehumidifying the affected areas, we can return your home to pre-loss condition!

Step-by-Step Guide: How to Paint Your Kitchen Cabinets

Step-by-Step Guide: How to Paint Your Kitchen Cabinets

Renewing the color of kitchen cabinets by repainting is an excellent way to bring a fresh new approach to your kitchen. We will teach you how to do this by demonstrating how to paint cabinets in phases.

Assessing Your Cabinets

Before painting, it is crucial to see how your kitchen cabinet painting looks. Carefully study the materials and the coating surface. Look at whether they need repair or are not 100% perfect. Also, assess whether your cabinets require a new paint job, repair, or replacement.

Gathering Materials and Tools

Collect all materials and equipment first, including brushes for work, rollers, cleaning paper, and items to sand surfaces to make them smooth. Then, you will get the primer and apply the first coat of paint, followed by your preferred color.

Choose superior-quality paint and primer cabinets designed for paint and primer to ensure they last longer and look like the experts did the job.

Preparing the Workspace

Before beginning kitchen cabinet refinishing, one should establish the working area properly. Ensure you free up everything beside the cupboards so you don’t bump anything as you work and nothing is in the way.

The number one thing is to cover most of the countertops, especially those around the painting area, with drop clothes or plastic sheeting to avoid paint splatters and spills and prevent any possible damage.

Removing Hardware and Doors

Remove items such as handles and hinges with proper tool adjustment. Please make sure that you remove the doors and drawers from the cabinets so you can finish painting them quickly without anything in the way. Label every item appropriately after taking it out to facilitate revamping the torn-apart items.

Cleaning and Sanding

To prepare your kitchen cabinets for painting, you must clean and sand them carefully. Start by thoroughly cleaning all surfaces to remove oil, dirt, or leftover substances. A mixture of warm water and gentle soap is adequate for this job. After cleaning, let the cabinets dry completely. Then, gently sand the surfaces to make them a bit rough.

Applying Primer

Before beginning to paint, ensure your cabinets are tidy and completely dry. It is beneficial to apply a superior primer intended for cabinet surfaces as it aids in sealing the surface and obstructs any stains or changes in color from appearing through the layer of paint.

Painting the Cabinets

Start applying the paint in slim, uniform layers. Use a good brush or roller and follow the wood pattern for a smooth surface. Paint the cabinet’s main structure first, then paint its doors. Wait until each layer is dehydrated before putting on another one.

Allowing Proper Drying Time

It is essential to wait after you paint your kitchen cupboards. If they dry well, the surface will look perfect and last long. Depending on the kind of paint used and the weather conditions, the paint fully dries out after at least 24 hours.

Reassembling Cabinets

After giving your cabinets enough time to dry, check them to see any flaws or places you did not paint. If there are rough parts or where the paint has run, smooth them with fantastic sandpaper. Use a petite brush or roller to correct any imperfections for consistent coverage.

Touching Up and Final Inspections

Once enough time has passed for drying, check your cabinets to see if there are any flaws or areas you did not paint. If you find rough patches or places where the paint has run, take some fine-grit sandpaper and gently smooth them. Apply slight corrections to imperfections using a tiny brush or roller for a uniform coating.

Pros and Cons of Painting Kitchen Cabinets by Yourself

Painting your kitchen cabinets inside your house is a good activity, but it’s essential to consider the pros and cons before starting. When you decide to paint the cabinets personally, you can save money that otherwise would go to expert painters. However, it’s a labor-intensive process that requires careful preparation, skill, and attention to detail. If not done correctly, DIY cabinet painting can lead to an uneven finish, peeling, or unsatisfactory results that may ultimately cost more to fix. Weigh your experience level, available time, and potential frustrations against the financial savings to determine if tackling this project yourself is the right choice.

Find the Right Professionals Painters If Needed

If you paint your kitchen cabinets, you cost-effectively change the area’s appearance and atmosphere. You might choose to do this job independently, but if you feel overwhelmed by the idea or need more time and skills, it is an excellent decision to get help from expert kitchen cabinet painters.

If you want professional help, Mr. Fixer provides excellent cabinet repainting services that will give you a smooth and pleasing process from beginning to end.

The Complete Guide to House Rewiring: Costs, Factors, and Tips

The Complete Guide to House Rewiring: Costs, Factors, and Tips

Rewiring a house is a significant undertaking that involves replacing outdated or faulty electrical wiring to ensure the safety and functionality of the home’s electrical system. Over time, wiring can deteriorate, posing serious risks such as electrical fires and shocks. Therefore, understanding the cost associated with rewiring is essential for homeowners considering this upgrade.

Factors Influencing the Cost of Rewiring

Size of the House

The size of the house is a primary factor influencing the cost of rewiring. Larger homes typically require more wiring and labor, resulting in higher expenses compared to smaller residences.

Age and Condition of the Wiring

Older homes with outdated wiring may require extensive rewiring to meet modern safety standards. Additionally, damaged or deteriorated wiring increases the complexity and cost of the rewiring project.

Accessibility of Wiring

The accessibility of wiring within the walls and ceilings affects the ease of installation and, consequently, the overall cost. Houses with difficult-to-reach wiring locations may incur higher labor charges.

Electrical System Upgrades

Upgrading the electrical system to accommodate modern appliances and technologies may add to the total cost of rewiring. This includes installing additional outlets, circuit breakers, and grounding systems.

Average Cost Breakdown

Labor Costs

Labor costs typically account for a significant portion of the total rewiring expenses. Electricians charge hourly rates for their services, depending on their experience and location.

Materials Costs

The cost of materials, including wiring, junction boxes, outlets, and circuit breakers, varies based on quality and quantity. Choosing high-quality materials ensures durability and reliability but may come at a higher price.

Permit and Inspection Fees

Obtaining permits and scheduling inspections are necessary steps in the rewiring process. Permit fees vary by location and are usually based on the scope of the project.

Additional Expenses to Consider

Cost of Repairing Damage

Electricians may encounter unexpected issues such as damaged walls or ceilings during the rewiring process. Repairing these damages adds to the overall cost of the project.

Hiring a Licensed Electrician

While DIY rewiring may seem cost-effective, hiring a licensed electrician ensures compliance with safety regulations and reduces the risk of errors or accidents.

Geographic Location

The cost of rewiring can vary significantly depending on the geographic location. Urban areas with higher living costs typically have higher labor rates compared to rural areas.

Ways to Save Money on Rewiring

Obtaining Multiple Quotes

It’s essential to obtain multiple quotes from different electricians to compare prices and services. This allows homeowners to find the best value for their budget.

DIY vs. Hiring a Professional

While DIY rewiring may save money upfront, it can be dangerous and may not meet safety standards. Hiring a professional ensures the job is done correctly and safely. It’s essential to assess the risks, your skill level, and the time required before attempting a DIY project, especially when it comes to electrical work.

For a comprehensive guide on when to tackle a project yourself or seek professional assistance, refer to our blog post “DIY vs. Handyman”. This informative article outlines the key factors to consider, helping you make an informed decision for your home repair needs.

Importance of Hiring a Qualified Electrician

Hiring a qualified electrician for rewiring ensures the job is done safely and up to code. Electricians have the expertise and experience to handle complex electrical projects and minimize the risk of hazards.

Conclusion

Rewiring a house is a significant investment that ensures the safety and functionality of the electrical system. By understanding the factors influencing the cost of rewiring and exploring ways to save money, homeowners can make informed decisions about this essential upgrade. When it comes to electrical work, it’s crucial to prioritize safety and hire qualified professionals. For reliable and expert electrical services in San Antonio, contact Mr. Fixer. Our team of licensed and experienced electricians is ready to handle your rewiring project with precision and professionalism, ensuring a safe and compliant electrical system for your home.

How To Fix A Leaky Faucet

How To Fix A Leaky Faucet?

Leaky faucets are a common household woe that can lead to both annoyance and increased water bills. Addressing this issue promptly is crucial to prevent further damage and conserve water. In this guide, we’ll explore the steps to fix a leaky faucet, ensuring you can tackle this problem with confidence.

Identifying the Type of Faucet Leak

Faucet leaks come in various forms, such as drip from the spout, around the base, or handle leaks. Understanding the specific type of leak is essential for effective troubleshooting. Each type requires a distinct approach to resolution.

Tools and Materials

Before diving into the repair process, gather essential tools and materials. An adjustable wrench, plumber’s tape, replacement parts, and a bucket or towels are key items. These will streamline the repair process and ensure you’re well-prepared.

Preliminary Steps

Start by shutting off the water supply to the affected faucet. Prepare the workspace by clearing the area and placing towels or a bucket to catch any excess water. Identify the make and model of your faucet, as this information is valuable for obtaining the right replacement parts.

Fixing a Drip from the Spout

For a drip from the spout, the culprit is often a worn-out O-ring or washer. Replace the O-ring or washer to remedy the issue effectively. This straightforward fix can significantly improve the faucet’s performance and eliminate the annoying drip.

Repairing Leaks around the Base

Leaks around the base may occur due to loose connections or worn-out plumber’s putty. Tighten loose connections with an adjustable wrench or apply a fresh plumber’s putty to create a watertight seal.

Addressing Handle Leaks

Handle leaks can be resolved by tightening a loose handle or replacing a faulty cartridge or valve stem. Ensuring the handles are securely attached and replacing worn components will contribute to a leak-free faucet.

Additional Tips for DIYers

Beyond immediate repairs, consider regular maintenance to prevent future leaks. Periodically check and tighten connections, and monitor water pressure. These simple tasks can go a long way in ensuring the longevity of your faucets.

When to Seek Professional Help

While many faucet issues can be resolved with DIY efforts, some problems may require professional intervention. If you encounter complex issues or have difficulty identifying the root cause, don’t hesitate to contact expert plumbers. Timely professional assistance can prevent further damage.

Conclusion

In conclusion, addressing a dripping faucet is well within reach with the proper expertise and equipment. Timely intervention not only eliminates the irritation of a dripping faucet but also plays a role in conserving water. Moreover, it’s essential to recognize the expertise of professionals like Mr. Fixer, who specializes in plumbing services. With our skillset, we ensure that even the smallest plumbing issues are promptly resolved, preventing potential larger problems down the line. So, don’t hesitate to contact us to seek assistance when needed, as a small repair today can save you from major headaches tomorrow.

Revive your home roof

Roof Trouble? Detect, Repair, Revive – All in One Guide!

In San Antonio, hurricanes, tornados, and severe thunderstorm winds will quickly cause concern for any homeowner regarding their roof’s durability. However, As time passes, the same roofing system that has withstood the elements no longer protects your dwelling due to everyday wear and extraordinary weather events. Therefore, below, we’ve provided insights about roofing repair, a roof fix, or home restoration when reviving your home’s most important shield.

Signs of Roof Decay

You may be unaware, but your roof silently battles the elements daily, and signs of decay often go unnoticed. So being on the lookout for even the smallest issues is necessary for lengthening your roof’s life. Subtle indicators, such as minor leaks, missing shingles, or a slight sag, can be early warnings of more significant problems Spotting these issues early on (and getting the proper roof fix) will help prevent costly repairs or complete roof replacement.

Understanding Roof Resurrection

Reviving a roof is a blend of art, math, and science. It goes beyond patching up damages. This process is about restoring your roof’s integrity and aesthetics. It involves a thorough assessment, identifying the root causes of the damage to any internal or external parts, and deciding whether to repair, reinforce, or replace your building’s cover.

Assessing Roof Damage

As a homeowner, you play a crucial role in detecting early roof damage. You can easily catch some surface issues and weaknesses in the joists and rafters when entering the attic.

Therefore, we suggest conducting seasonal inspections before winter and summer and after extreme weather events. Look for signs like loose or missing shingles, clogged gutters, and debris on the roof. Document any anomalies with photos to show professionals and to avoid stepping on the roof.

Choosing the Right Roofing Materials

Selecting the best roofing repair material is crucial, and multiple options exist. For instance, asphalt shingles are easy to install and affordable but have a shorter lifespan. On the other hand, metal roofing offers durability, longevity, and energy efficiency. Plus, it keeps your home cooler. Rather than spending time on guesswork,contacting a professional about roofing materials and costs is always best.

DIY Roof Resurrection Tips

When attempting to complete your roof fix, remember that safety is paramount for those who prefer a hands-on home restoration approach. Regardless of the roofing repair, we recommend that you consider the following before proceeding:

  • Roofing safety protocols
  • High-risk involvement
  • Professional roofing repair tools
  • Home restoration experience
  • Time constraints to finish quickly.

Should you have any doubts, we recommend calling a local roofing professional.

Hiring Professional Roofing Services

Professional Roofing Services

And honestly, taking the DIY route doesn’t always provide the most effective solution. Complex roofing issues demand professional expertise. Hiring experts like Mr. Fixer ensures skilled craftsmanship and adherence to safety standards. They will discuss the advantages of professional services, from thorough assessments, material costs, scheduling, and high-quality repair recommendations.

Sustainability in Roofing

Sustainable roofing is not just an environmentally friendly choice; it’s also a strategic investment. Recycled roofing materials, from rubber to plastic, are increasingly popular for their reduced environmental footprint. Using sustainable options, homeowners significantly lower their energy costs and contribute to a healthier environment.

Future-Proofing Your Roof with Mr. Fixer

To help avoid immediate roof repairs or home renovation, regular roofing attention, such as gutter cleaning, debris removal, and seasonal inspections, will significantly extend the life of your roof. Mr. Fixer Home Services offers comprehensive maintenance plans tailored to each homeowner’s needs. By future-proofing your roof, you will avoid costly roof repairs in the future.

Water Mitigation Vs. Water Restoration

Water Mitigation Vs. Water Restoration: What’s The Difference?

Without warning, water damage can strike your home or business unexpectedly, causing extensive damage, from structural weakening to potential health risks. Below, discover the differences between water mitigation, water restoration, and the water damage restoration process for a quick and timely recovery.

Water Mitigation

Water mitigation focuses on preventing further damage after a water damage incident. This process involves immediate actions like water extraction, drying the affected areas, and removing unsalvageable materials such as swollen wooden furniture, water-soaked carpets, or damaged ceiling insulation. It’s a crucial first step to stabilizing your environment, reducing the potential for additional water damage, and preparing for restoration. Quick and effective mitigation can significantly lessen the impact of water damage on your property.

Water Restoration

Water damage restoration goes beyond drying, cleaning, sanitizing, and refurbishing affected areas. It’s your critical step in fully recovering from water damage, ensuring your property is safe, healthy, and comfortable for those inside. Water restoration is the complete process of restoring your property to its pre-damaged condition following water damage events. This phase encompasses repairing or replacing damaged materials, addressing mold and moisture issues, and ensuring your property’s structural integrity and safety.

Differences Between Water Restoration And Water Mitigation

It is vital to clearly understand the distinctions between water mitigation and water restoration when dealing with water damage. Although both are necessary for restoration, they have distinct functions and involve separate procedures. The differences are Purpose, Timing, Process, Scope, and End Goal. Below, each provides what it entails and its importance in the overall process of water damage recovery.

Water Mitigation: The primary aim is to prevent further damage by immediately addressing the water intrusion. That involves quick actions to stop water spreading and secure your property from additional exposure.

Water Restoration: Here, the focus shifts to repairing and restoring your property. It involves a thorough approach to bringing your property back to its original or better condition, addressing all damages caused by water.

Water Mitigation: This is an urgent, initial response. Mitigation steps must be taken to prevent escalation when water damage occurs.

Water Restoration: This process begins once the immediate threat of further damage has been mitigated. It often requires more time, as it involves detailed planning and execution.

Water Mitigation: Involves steps like water extraction, dehumidification, and emergency board-up services. The focus is on removing water and reducing moisture levels.

Water Restoration: This goes beyond drying, including repairing damaged structures, replacing materials, and possibly remodeling parts of the water-affected property.

Water Mitigation: It’s about containment, focusing on the affected areas to prevent damage from spreading to unaffected parts of your property.

Water Restoration: This has a broader scope, encompassing the affected area to repair, improve, and restore it fully.

Water Mitigation: The immediate goal is stabilization, ensuring the situation doesn’t worsen and your property is safe from further damage.

Water Restoration: The end goal is comprehensive recovery and restoration, making your property habitable and visually appealing, restoring it to its pre-damaged state or better.

Each point contributes to a holistic approach to managing water damage, emphasizing the importance of professional intervention in different stages of water damage restoration.

Attempting DIY repairs can be risky and ineffective when faced with unexpected water damage. Calling a professional is crucial if dealing with sewage or contaminated water, mold growth, extensive damage or structural issues, or electrical concerns. Mr. Fixer provides expert solutions, deploying specialized equipment and a skilled team to ensure a safe, comprehensive, and efficient restoration process.

Handyman vs. DIY

DIY vs. Handyman: When to Call Mr. Fixer for Help!

Every now and then, something may go wrong at home and call for immediate action to be taken. In some of these cases, it can be a bit hard to decide whether you need to call a home repair handyman or attempt to DIY. The answer is that what you choose to do depends on a number of factors. Some of these are outlined below and they should make it clearer for you to figure out whether to go ahead and pull out your toolbox or call an expert to get the job done.

The Risk Factor of the Project

The first and most important consideration for you to make when thinking of whether to seek handyman repair services or DIY is the risk factor of the project. There are a number of projects that you simply shouldn’t think about working on, and one of these is anything to do with electrical wiring. This can put you at risk of electrocution if you don’t have the training to handle electricity. Another project to avoid on grounds of safety is the roof since it’s at a considerable height off the ground.

Whether You Have the Tools

Another consideration that you need to make is whether you have the necessary tools and equipment to do the project safely and efficiently. Various projects will call for different tools, some of which may not be common parts of the average tool kit. Renting can be a valid solution if you already know how to use the equipment and the cost to rent it is reasonable. If it isn’t, you’re better off simply hiring an expert who’s going to have everything that they need to do the job with them.

Your Skill Level

Not all people have the same abilities as far as working on things around the house is concerned. This is the main reason why it’s a good idea, to be honest with yourself for this consideration. If you generally struggle with basic tasks around the house, it’s best that you don’t take on any complicated ones because they may result in a shoddy job at best.

How Much Time You Can Spare

Consider thinking about how much time you can realistically spare to get the project done. This is an important consideration to make because you don’t want to upset your schedule. It’s also not appealing to end up with an unfinished project for a long time when you need help finding time to complete it. That said, always begin by first finding out how much time a given project needs and weigh this against the urgency with which the project may need to be done as well as how much time you have. This way, you can make an accurate estimation.

In conclusion, if the project is deemed risky, you lack the necessary tools or time, or you simply don’t consider yourself a handy person, it’s wise to seek professional help. Entrusting the task to an experienced handyman ensures a successful outcome without the hassles of DIY challenges.

For all your handyman service needs, don’t hesitate to contact Mr. Fixer. Our skilled professionals are equipped to handle a wide range of home repairs, ensuring your peace of mind and maintaining your home in top-notch condition. Take the stress out of DIY – call Mr. Fixer for expert assistance today!”